With the demand for green spaces growing over the years, new technologies are coming up to ease the planting process. Planting technologies like Hydroseeding make it very easy to grow grass for your home lawn and even in large public spaces.
The technology has taken away most of the hard work required to prep the soil before planting. Unlike when using turf grass which will need you to clear all objects from the lawn before you can grow it, Hydroseeding allows you to plant even when you have other plants on the lawn.
Planting on slopes is also easier, with Hydroseeding giving you an end product that looks even and neat. Hydroseeding is without a doubt the future and with the added advantage of cutting down on the work required to get a beautiful lawn. Below we are going to take an in-depth look at Hydroseeding so that you can get a better understanding before you jump into it.
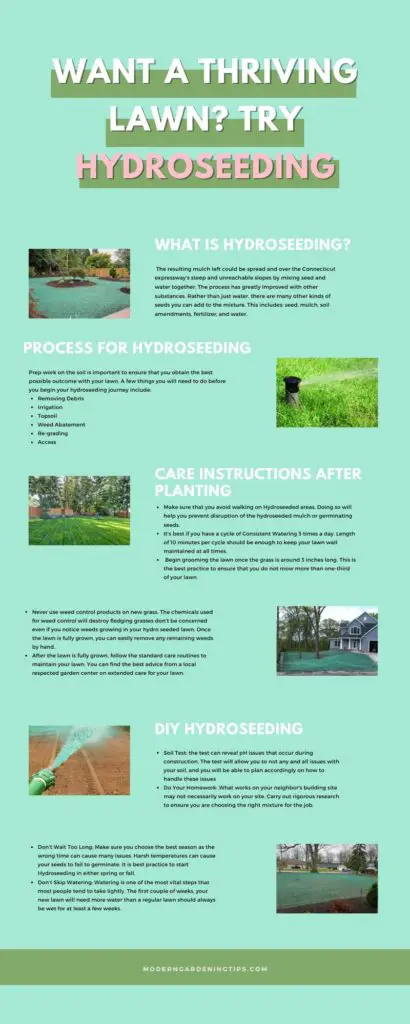
What Is Hydroseeding?
Hydroseeding has its roots all the way back in the 1940s in the USA. It was in Connecticut that Maurice Mandell, working for the Connecticut Highway Department, developed the process.
Mandell realized that the resulting mulch could spread and sprayed over the Connecticut expressways steep and otherwise unreachable slopes by mixing seed and water together.
The process has greatly improved with other substances other than just water and seeds being added to the mixture. This process now forms slurry by mixing seed, mulch, soil amendments, fertilizer, and water.
The slurry is mixed in a hydroseeder tank, after which high pressure is used to apply it to the intended surface. Besides, the hydroseeder tank also helps in keeping the slurry evenly mixed.
This process allows for fast germination, which also helps in preventing soil erosion. In the best circumstances, the newly planted grass will begin to sprout in only a week. However, most of the time, it usually takes about 2 to 3 weeks for germination to take place. If all goes well, you should begin grooming your lawn in 4 to 5 weeks.
Hydroseeding Preparation
Like in any planting process, prep work on the soil is important to ensure that you obtain the best possible outcome with your lawn. There are a few things you will need to do before you begin your hydroseeding journey.
Rest easy the preparations are not hard, as shown below.
- Remove Debris
You will begin this process by removing all the rocks, sticks or other debris from the surface area. After this, you might also want to get rid of all the existing grass and weeds from your lawn.
Removing the debris will also help your lawn look net and even when your grass grows in, so make sure you do not skip this step.
- Irrigation
For your hydroseeding project to be a success, you will need to have a proper landscape irrigation system. This is especially true for dryer areas like Southern California. Before you begin Hydroseeding, make sure that you have installed and tested your irrigation system.
To ensure that you do not have waste water, it is extremely important that you choose a water-wise solution. This will help to minimize water waste and water usage. Better yet, it will help with the water conservation efforts and also save you some money.
You can get some very useful information on the best irrigation systems by clicking here.
- Topsoil
For those who studied agriculture in high school, you know this refers to the topmost layer of your lawn soil. It is also the most fertile layer and helps the seeds grow due to lots of nutrients in it.
You should take care not to damage this soil layer with too many chemicals and pollution. If the soil is compacted, then you will need to lightly till the soil to a depth of 4 inches or less.
If you suspect your soil is polluted or infertile, then you can replace the soil. When you are amending the soil, we recommend you employ a 50/50 blend mix. Also, it would be best to check with the local authorities and experts on the best way to amend the soil.
- Weed & Grass Abatement
When prepping the lawn for Hydroseeding, we advise that you apply granular fertilizer (16-6-8) to your lawn. After this, water a minimum of ten days to bring up dormant weed seeds.
At this point, you should apply a weed & grass killer to the newly germinated weeds. Ensure that you do not water the target area for the next 24 hours after applying the weed & grass herbicide.
Doing this will help minimize excessive weed growth in the future. Subsequently, wait approximately 1-5 days after weed abatement, depending on the herbicide use (check the product label for specifics) before hydroseed application.
- Re-grading
A day or two before the Hydroseeding takes place, make sure you grade your soil. You will do this to make sure that the surface is free of all debris and is smooth. Re-grading will also help ensure the surface is smooth and level. Ensure you leave the surface loose and not compacted when you are done.
- Access
The last thing you will need to do is provide access to the target areas for the hydroseeding equipment. You should get rid of all obstacles that might hinder access prior to the arrival of the equipment.
Hydroseed Care Instructions after Planting
If you intend to achieve the best results after planting, you will need to take good care of your newly hydroseeded lawn or garden areas.
Below are a few important hydroseed care instructions to follow:
Traffic on the Lawn
Ensure that you avoid walking on hydroseeded areas. Try your best to keep children, pets, and other pedestrian traffic out of your lawn. Doing so will help you avoid disruption of the hydroseeded mulch or germinating seeds.
For the next 5 to 6 weeks after the planting, do your best to minimize traffic. Doing so will allow your lawn to mature. We are sure that by now you know that foot traffic can damage not only new grass but also fully grown grass.
Consistent Watering
Begin your watering routine the day after application. It is best practice to have a cycle of 3 times a day. For example, perform your irrigation at 8 am, 12:00 Noon, and 4 pm. The length of your watering per cycle will be dependent on your water pressure.
That said, a length of 10 minutes per cycle should be enough to keep your lawn well maintained. The goal you need to keep in mind is to have the surface of newly seeded areas consistently moist, like a sponge.
Once you notice that the seed is 100% germinated, you can adjust the watering cycle to once a day or every other day, in the evening, at 5 pm. The irrigation will vary depending on temperature; you should water the grass every day for dry areas.
Note: As you water the lawn, you will see the dye used in the slurry application fade within a day or so.
The fading is expected and is not an indication of any problem with the hydroseed application.
Monitoring the Lawn
Keep a close eye on your newly seeded lawn areas; this will allow you to make any changes to the watering cycle if need be. For instance, you will need to increase the watering cycle to 2 times a day when the temperature becomes too hot and stop the watering for the rainy days.
Mowing
You can begin grooming the lawn once the grass grows to a length of 3 inches. It is best practice to ensure that you do not mow more than one-third of your lawn (that is, you should only cut 1 inch or less of the top).
Over mowing the grass may cause it to die, and you will be forced to begin the planting process over a fresh.
Fertilizer
30 days after the application of Hydroseeding, we recommend you fertilize your new lawn. It is, however, important to note that over-fertilization will kill any crop, including your grass.
Make sure you read and follow inattentively the instructions provided on the fertilizer packaging.
Try your best always to use a high nitrogen fertilizer. During the first 3 months of growth, it is not recommended to use a fertilizer with weed control.
Weed Control
You should never use weed control products on new grass. The chemicals used for weed control will destroy fledging grasses. You should not be concerned even if you notice weeds growing in your hydroseeded lawn.
With some time, the grass will grow, and the advancing grassroots will choke most of the weeds.
Once the lawn is fully grown, you can easily remove any remaining weeds by hand.
Ongoing Care
After the lawn is fully grown, you should follow the standard care routines to maintain your lawn. You can find the best advice from a local respected garden centre on extended care for your lawn. Finding help that is specific to your area will enable you to get better results with your Hydroseeding and the best ways to keep weeds at bay.
When Is The Best Time To Hydroseed?
Generally, both fall and spring are great times to hydroseed your lawn. During the spring, Hydroseeding will benefit from moderate temperatures. Late summer and early fall are also optimal, with an increase in precipitation and the temperatures continue to fall.
Plants will grow faster during the spring and fall seasons than in cold and hot seasons. Your lawn will also require less water compared to a lawn that began in the drier summer season.
For the first 6 weeks of Hydroseeding, the ideal temperature should be between 65 and 75 degrees. If the temperatures fall too far outside this window, it will be considered to be harsh and can lead to different issues.
DIY Hydroseeding
For those of you who are like me, who love doing things for their own, I am sure it is ringing in your head, ‘can I do hydroseeding for myself?’ Well, worry not. Here are the do’s and don’ts you will need to follow when growing your lawn.
The process of Hydroseeding can be fairly complicated and expensive. So before you jump into it and burn out your time and money leading to with regret, follow the below steps for the best results.
- Conduct a Soil Test
The soil test is the breakfast of your process. I know it seems as you can do without breakfast, it is strongly advised that you do not as it is important to your health. The same applies to your soil; the test can reveal pH issues that occur during construction.
The test will allow you to not any and all issues with your soil, and you will be able to plan accordingly on how to handle these issues. Performing this test will give your hydroseeding process the best possible start and a good chance of success.
- Do Your Homework
Hydroseeding “slurries” are developed using different combinations of seed, fertilizer, mulch, soil amendments, and water. These mixtures will be different depending on the climate they were developed to be used.
What works on your neighbor’s building site may not necessarily work on your site. Please carry out enough research to ensure you are choosing the right mixture for the job.
- Don’t Wait Too Long
When you begin your hydroseeding project, ensure you choose the best season as the wrong time can cause a lot of issues. Harsher temperatures (both hot and cold) can cause your seeds to fail to germinate. It is best practice to start Hydroseeding in either spring or fall due to milder temperatures and precipitation levels.
- Don’t Skip Watering
Watering is probably one of the most vital steps and also one that most people tend to take lightly. In the first couple of weeks, your new lawn will need more water than a regular lawn.
It should always be wet for at least a few weeks. This step will make the difference between a successful project and a failure. Ensure you have a proper irrigation system, as this will ease the process of watering your lawn.
How Often Should You Water Hydroseed?
While newly hydroseeded lawns will need to get watered regularly, you can’t begin the irrigation immediately. The mulch must dry completely before you can start watering. The drying process usually takes about a day, allowing the tackifier in the mulch to set up. Once the mulch has had enough time to dry, you can then begin your watering routine.
For the first couple of weeks, the lawn will need to be consistently wet. Your lawn will need moisture in order for the new grass to germinate. The best practice is to water the lawn for 10-15 minutes three times a day. If you are experiencing water run-off issues, you can reduce your watering time.
It is important always to pay attention to the weather. Avoid watering the lawn whenever it rains. The temperature should affect your watering schedule too. If the temperature surpasses 85 degrees and there is humidity, do not water the lawn after 3 pm. High temperatures can lead to fungus growth and damage your lawn. In areas that are particularly shady on your lawn, give the mulch adequate time to dry before watering.
After mowing for the first time, you can begin to water less often, but make sure you water for longer periods than before. This will help the grass establish stronger and deeper roots.
The general rule is to give your lawn 1-2 inches of water per week.
How Long Do You Have To Stay Off Of Hydroseed Lawn
After the hydroseeding application, you will need to allow the mulch to completely dry before you can walk on it at all. Once you begin watering the lawn, you should avoid walking on it unless it is absolutely necessary. Keep off the lawn until after you are able to mow the first time.
Does Hydroseed Wash Away In Rainy Seasons?
Unfortunately, hydroseed, just like any other seed planting, is not exempt from soil erosion. Although the seeds will need to get constant watering for the first few weeks, heavy rain will wash away the seeds if they have not begun germinating and developing roots.
Heavy rainfall will wash away any and all seeds if they have not developed a proper root system. Proper site preparation will help lessen the effects since it will speed up the seed germination and help form deeper roots.
You will need to replant the portions of your lawn that heavy rain has washed away. Ensure that you follow the proper maintenance to create an even, beautiful lawn.
Try your best to plant your seeds sometime before the rainy seasons, as this may lead to your lawn growing unevenly. If, for one reason or another, you find it impossible to avoid the rainy seasons, then make sure you practice proper lawn maintenance to fill out your lawn evenly in the end. If your lawn is not growing evenly, you may need to reseed areas again.
During heavy rains, you can lessen soil erosion by utilizing straw erosion blankets. The straw erosion blankets can endure extreme water runoff, all the while preventing your hydroseed from getting washed away by the rainwater. We recommend placing these blankets in swales, slopes, ditches, and large hills.
How Long Will It Take For Hydroseed Grass To Grow?
The hydroseed lawn growth will come in at a different pace as it is affected by the climate, watering, and seed mixture. The lawns usually start to sprout within 5-7 days.
Suppose you practice proper lawn maintenance (applying a starter fertilizer 3 times every 3-4 weeks) and are fortunate to experience favorable weather conditions. In that case, your lawn will reach 3 inches long in a span of one month. This is when you can mow for the first time.
Hydroseeding Mulch – Different Types of Mulch and Their Application
- 100% Paper Mulch
This is made using chopped up newspaper and a blue/green dye. The mulch is available in bales of 30, 40 & 50-pound sizes wrapped in plastic. It gives a very good performs and is considered to be the best choice for jet agitated hydroseeders.
You should note that the heavier the bale, the more it is compacted. Lighter bales have been loosely packed and easier to add to a jet unit than heavier bales that are more compact. With paper mulching, you get a combination of high performance and a low price, making it one of the best choices available.
- Pourable Mulch
This type of mulching is typically a combination of two different products. The mulch can incorporate a mixture of paper and corn or paper and wood. The mulch works best with smaller jet machines that have smaller openings used for spraying.
These mulches are essentially flakes or pellets that can be emptied right into the jet machine within a few seconds with no spillage.
Two companies only make pourable mulches. The companies are, Profile Products which sell their mulch using the name “Cover Grow” and “Seed Aide”, and the Phoenix Paper company who sells their mulch using the name EZ Mulch AF.
- Wood Mulches
These mulches are made by using wood byproducts. The biggest advantage of using this mulch is that wood mulches can retain more water than paper mulch.
The drawback to using wood mulching is that it will take longer to absorb water, so the mulch must mix for a longer time. We do not recommend using 100% wood mulches in any jet machine. Wood mulches tend to float more, and when the tank runs low, the water can leach out of the mulch, and you will end up with a thick layer of mulch at the bottom of the tank.
There are also part paper and part wood mulches that are available. If you get blended mulches with a ratio of 50-50, then you can use them in jet units 300 gallons and larger, and a ratio of 70-30 mulches can be used in smaller jet units.
Make sure you always wash and flush out any unit when you are done spraying and applying your hydroseeder. As wood mulch will absorb more water for some time and swell, it is not recommended to keep it sitting in the unit as you will end up getting clogs in the machine.
- High-Performance Mulch
For Hydroseeding that will be used in severe erosion control jobs, there are some high-performance mulches available. These mulches will often have names like Bonded Fiber Matrix (BFM’s) or Flexible Growth Media (FGM’s).
The mulch will generally be wood mulch that has additives helping them stick even better. With this extra advantage, it comes with an extra cost (ranging up to 4 times the price of paper mulch).
The mulch will also require a heavy application (often at 3000 to 4000 pounds per acre). One of the most popular and best high-performance mulch at this time is Flexera. That said, there are multiple choices of products that work just as well.
- Other Mulches
There are a few other products available that are used in Hydroseeding mulch. This includes products made using straw and cotton.
Seeds Used In Hydroseeding Applications
The biggest advantage of using Hydroseeding is that you can use almost any seed available in the market. The seeds include wildflowers, grass seed, and erosion control seeds such as birdsfoot trefoil and crown vetch.
It is important to note that some grasses have no commercially available seed, such as St Augustine. Among grass seeds commonly hydroseeded are ryegrasses, bluegrass, centipede, fescue, Bermuda, Bahia, native grasses, wildflowers and many more. To use Hydroseeding, you will not need to have any special seeds.
Fertilizer for Hydroseeding
When using hydroseeders, you can apply any fertilizer available to you. That includes granular, water-soluble and liquid. We, however, do not recommend the use of an Agricultural Fertilizer.
When Hydroseeding, we highly recommend the use of a high phosphorus starter fertilizer. That said, most people like to use a balanced fertilizer such as a 19-19-19. Keep in mind that the higher the numbers, the less filler is in the fertilizer.
With nitrogen being corrosive and a hydroseeder with a metal tank, some operators prefer to spread the fertilizer as a second step and apply it using a fertilizer spreader. When using a hydroseeder with a poly tank, this will not be a concern.
Hydroseeding Tack (Tackifier)
Hydroseeding tackifers are used to accomplish two things. One, they will work like glue preventing erosion and hold the mulch and seed in place in the case of rains, even heavy rains. Two, they also help to lubricate the system and make it slippery this helps in preventing clogs in a hydroseeder.
Among the products used to make tackifier is polyacrylamide, mostly applied at 3 pounds to the acre. The polyacrylamide is easy to store and inexpensive. Tackifier is also made using Guar, which is produced using the gum of the Guar tree. Guar is usually applied at about 30 pounds to the acre.
Optional Products to Use
Co-Polymer Gel is mostly used as it will hold 400 times its weight in water. The co-polymer gel will slowly release the water into the seedbed when it is applied. It can reduce watering needs by 50%. This is an optional product that we highly recommend for areas that will have challenges when it comes to watering the seeds.
There are many natural additives available in the market used to help the seed germinate better and help make the grass plants healthier. A lot of people using Hydroseeding like to add these to their mix to make sure they get the best lawn possible.
There are a few herbicides you can add to the hydroseeding mix to minimize the competition from weeds in the new lawn.
One of the most popular herbicides used in the hydroseeding mix is “Drive”. It will, however, affect the germination rate of any Kentucky bluegrass in the blend reducing it by about 25%. Thus, hydroseeding experts add extra seed to cover the decreased germination rate if that grass is in the mix. Using a herbicide in your mix may need you to have an applicators license, so check with your state requirements.
The use of lime in a hydroseeder tank is something we would not recommend you to do. Microscopically the molecules for lime are very sharp and hard. The molecules can cause your pump to wear excessively.
We would recommend that you apply the lime separately. The best option that is more acceptable is the use of Liquid Lime or Profile’s Nutra-Lime dry. They are both highly concentrated, and one gallon of liquid lime will generally give you similar results to 1340 pounds of ag lime and will accomplish that faster.
- Spray on Topsoil
Spray on topsoil is a new product that has gotten positive feedback and reports. The product will generally provide better results than topsoil replacement, well, at least according to the reports received.
This is basically a topsoil replacement that is sprayed right on the job site. The product is particularly good for steep slopes where applying topsoil will prove to be difficult.
Among the best products available is “ProGanics” made by a company called profile products and Biotic Earth. Depending on the size of your tank, one load of these products can replace 1 to 3 truckloads of topsoil. We recommend you use this product, and we would love to hear about your experience with it.
Advantages of Hydroseeding
Some of the benefits of using Hydroseeding on your lawn include;
- Fast and one step lawn seeding. You will get germination in 2 weeks after Hydroseeding, and you can start to mow your lawn in 1 month.
- Hydroseeding will typically provide faster germination, and your lawn will have fewer weeds. With the grass seeds being closely planted, the grass will grow and choke any weeds that grow.
- Since Hydroseeding is done by spraying, it allows you to trim around landscape features and walkways. You can easily spray around the landscape and walkways to ensure that you get an even and fully covered lawn.
- The process is the easiest way to plant on hillsides and steep slopes. With the planting process using a jet spray, all you need to do is stand at a distance and spray on the seeds onto the hillside. You can also use a plane to spray seeds on large wild areas that wildfires have damaged.
- The process allows you to get even seed disbursement providing more uniform grass germination.
- You will jump-start the seed germination as they will be placed in a nutrient-rich solution.
- A hydroseeded lawn gives a better appearance than that of a dry seeded lawn. Clients love the look of a newly hydroseeded lawn. With the use of a dye, you get a colorful lawn when planting, which is more appealing to the clients. You also do not need to worry about the day changing the color of your grass as it will wash off when you water the lawn.
- You will get better quality with Hydroseeding. The lawn will tend to be healthier and last a lot longer than sodding and hand seeding applications. The grass will tend to develop deeper roots and also avoid the shock of transplanting to different soils.
The lawn will yield better results on the first installation, with the seeds been more resistant to external problems.
- With the use of Hydroseeding, the cost of planting can be anywhere from 50% to 80% less compared to the cost of using sod. If a hand-sewn lawn takes a day to plant completely, the same area can be done using Hydroseeding in about 2 to 3 hours. This will significantly save on labour costs and even on time spent in planting grass.
Hydroseeding vs. Sod
- The cost to hydroseed is a small fraction of the cost to lay sod.
- A hydroseeded lawn will need less watering compared to that of a sodded lawn.
- Harvesting sod tends to cut the roots, and this might lead to the sod job failing.
- You will need far less labour involved when you use the hydroseeding process.
- Sod will require proper installation as a poorly done job will lead to failure of the sod. With Hydroseeding, all you will need to do is spray the solution at let the grass grow.
Hydroseeding vs. Dry Seeding
- Hydroseeding is a one-step process that will reduce labor costs.
- You will get weed seeds in it with straw, a problem you will not experience with Hydroseeding.
- Wind will easily blow away the straw or clump it. Also, you will need to rake off the straw once the lawn is established.
- Hydroseeding is considered an excellent way to seed but costs less than dry seeding.
Disadvantages of Hydroseeding
- Hydroseeding can be used only when there is enough time in the season to guarantee adequate vegetation formation and erosion control. Otherwise, Hydroseeding will need to be used together with a binding mulching.
- While Hydroseeding will be a lot more cost-effective when used in large areas, the same cannot be said for smaller areas. The cost per acre will quickly catch up when you use Hydroseeding on small lawns.
- Hydroseeding will not be the best method to use during dry seasons if you do not have an adequate water supply for irrigation. The process will need a large amount of water during the first few weeks of germination.
- Wood mulches are generally short-lived and will need to get a 24 hour rest period allowing it to dry before more water is added to it for your Hydroseeding to be effective. This waiting period will be a problem if you plant during the rainy season.
- Access to remote areas will be a challenge. You may incur additional costs to use this process in remote, inaccessible areas. The use of plains can be applied for these areas but will come at a rather substantial extra cost.
Suitable Applications of Hydroseeding
Hydroseeding can be used to fix disturbed areas that are in need of immediate protection as permanent stabilization is established. It is not recommended to use Hydroseeding alone without bonding mulch to prevent erosion as this will not be effective.
It would be best if you combined Hydroseeding with other additional methods until vegetation is properly established.
Some of the areas you can use hydroseeding include:
- Disturbed soil or graded areas where permanent stabilization will not be immediately possible before seed germination.
- Cleared and graded areas that are exposed to seasonal rains or temporary irrigation systems.
- Repairing of large areas that have been damaged by forest and wildfires. Hydroseeding will help this area to recover quickly and bring back vegetation covers in these areas.
How Does Hydroseeding Help In Conservation?
One of the biggest advantages of Hydroseeding is the fact that almost any plant that can grow from a seed can be planted using Hydroseeding. An example is a grass that will naturally thrive in shady areas that are useful in covering areas with well-established trees.
This comes in handy when cutting down trees to facilitate the growth of grass is not an option. The Hydroseeding professional will simply use a grass seed type that will thrive in shady areas.
With the increasing push for sustainable agriculture, there is a large push for the use of native grass as they will use fewer pesticides as they will be naturally resistant to the native pest.
The native grasses in some areas also help in water conservation. The grass is already adapted to the climate of the region and will not be overly thirsty. Using these native seeds to grow the good grass for a region will help reduce the use of water to irrigate the grass.
Can Hydroseeding Improve The Soil Quality?
Most of the time, Hydroseeding is used to plant grass in areas that the soil quality is poor. An example is areas that have undergone construction or areas where the topsoil has been stripped. This area will have lost the microflora and fauna that naturally stimulate the growth of plants.
In such cases, a professional will add natural or manufactured soil conditioners. The conditioners will help the planted seeds become established and encourage them to produce by changing the soil’s chemical and/or physical characteristics. Both organic and inorganic soil conditioners provide adequate nutrients to the surrounding plants, plus they improve the aeration and drainage of the soil.
Hydroseeding is also done with the use of an application sprayer. This method of adding healthy soil is fast and cost-effective compared to adding nutrients into the soil using other methods.
The soil treatment method used in this case offers a sustainable and alternative to the use of peat. Peat-rich landscapes can take years to recover from disturbances caused when harvesting. The peat is also currently under threat from agricultural and urbanization projects.
Limitations of Hydroseeding
It might be difficult to get your hands on the hydroseeding equipment just before the rainy seasons and before storms as they are usually in high demand at this time.
The hydraulic seeds will need to be applied together with a hydraulic mulch. If you use a stand-alone hydroseed application, then you must follow the application with one of the following;
- Straw mulch.
- Application of compost blanket.
- Use and implementation of a rolled and control erosion products.
If you use Hydroseeding with no mulching, then you should note that your lawn will not get immediate soil erosion control. Temporary seeding will not be suitable for steep slopes. Using Hydroseeding with no mulch will be highly ineffective on slopes as the seeds will get washed off with any water running down the slope. During dry seasons you must invest in an irrigation system as the hydroseeding application will need substantial water in order for the grass to grow.
Take Away
The implementation and adaptation of Hydroseeding has brought about a change in the agriculture sector. With the process allowing for the growth of virtually any seed available, the process has also helped conservation efforts as you can plant native seeds.
Generally, this process continues to be extremely cost-effective, especially when growing over large and hard to reach areas. It is now possible to plant grass in areas that would otherwise have been a big challenge to plant.
Are you interested in getting such content that ranks for your website? I can help you produce well-researched content in the gardening niche, and many other niches, at an affordable rate. I am a passionate gardener and gardening writer myself and I also work with several other writers and editors to produce content for my website and for clients. Reach me at p9mwangi@gmail.com, or check creativitypot.com where I offer my writing and digital marketing services.
Made...
$13.99 (as of June 22, 2025 10:07 GMT +00:00 - More infoProduct prices and availability are accurate as of the date/time indicated and are subject to change. Any price and availability information displayed on [relevant Amazon Site(s), as applicable] at the time of purchase will apply to the purchase of this product.)
Fisk...
$64.99 (as of June 22, 2025 10:07 GMT +00:00 - More infoProduct prices and availability are accurate as of the date/time indicated and are subject to change. Any price and availability information displayed on [relevant Amazon Site(s), as applicable] at the time of purchase will apply to the purchase of this product.)
COPR...
$39.99 (as of June 22, 2025 10:07 GMT +00:00 - More infoProduct prices and availability are accurate as of the date/time indicated and are subject to change. Any price and availability information displayed on [relevant Amazon Site(s), as applicable] at the time of purchase will apply to the purchase of this product.)
ROSO...
$44.99 (as of June 22, 2025 10:07 GMT +00:00 - More infoProduct prices and availability are accurate as of the date/time indicated and are subject to change. Any price and availability information displayed on [relevant Amazon Site(s), as applicable] at the time of purchase will apply to the purchase of this product.)